Description
Windows are an extremely important part of the conversion. They have a direct effect on almost all aspects of your build: temperature, moisture content, style, and possible water ingress points. Cutting into the van itself should be done as early in the build as possible in order to be able to treat all metal for rust and to ensure the fragments can be cleaned up so they do not create more problems. Of course, cutting into the van at the very beginning of the project was a scary concept for me, but after the first cuts it gets easier. It makes it much easier to work with a partner for the windows, but I had to fly solo and it worked out alright, just a little more difficult in places.
Background
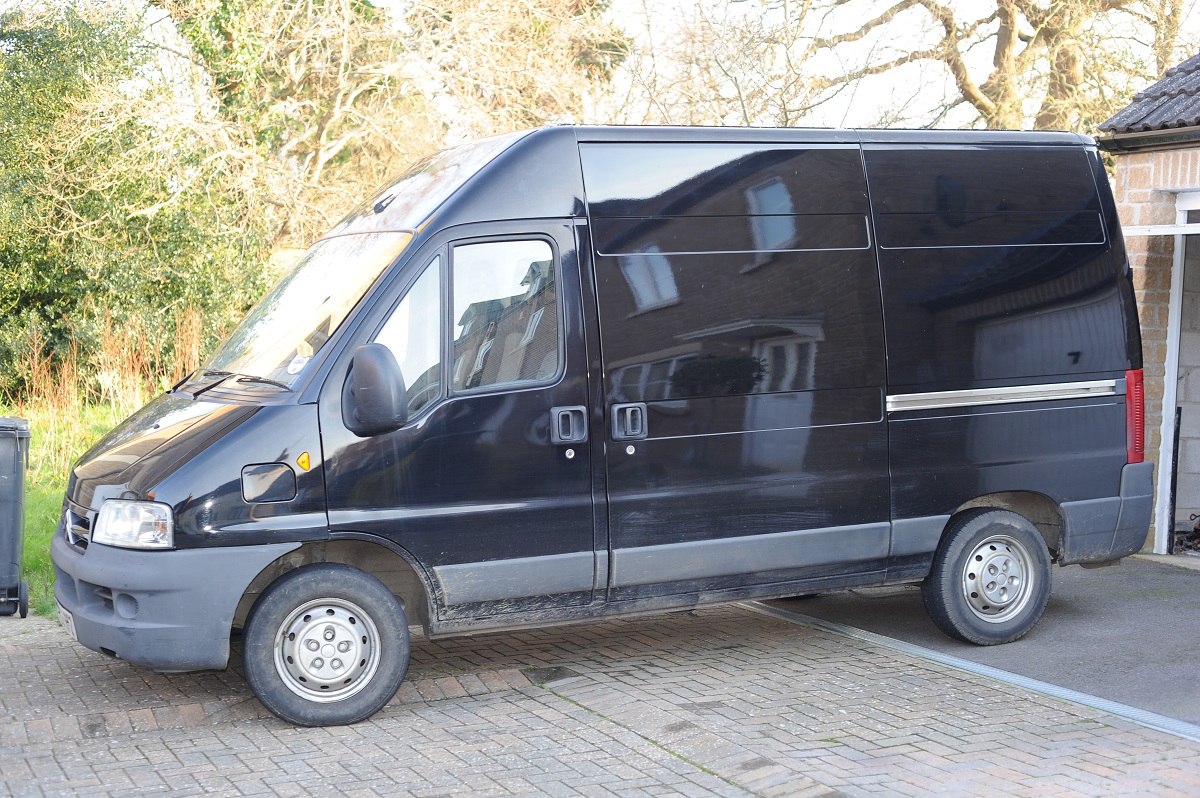
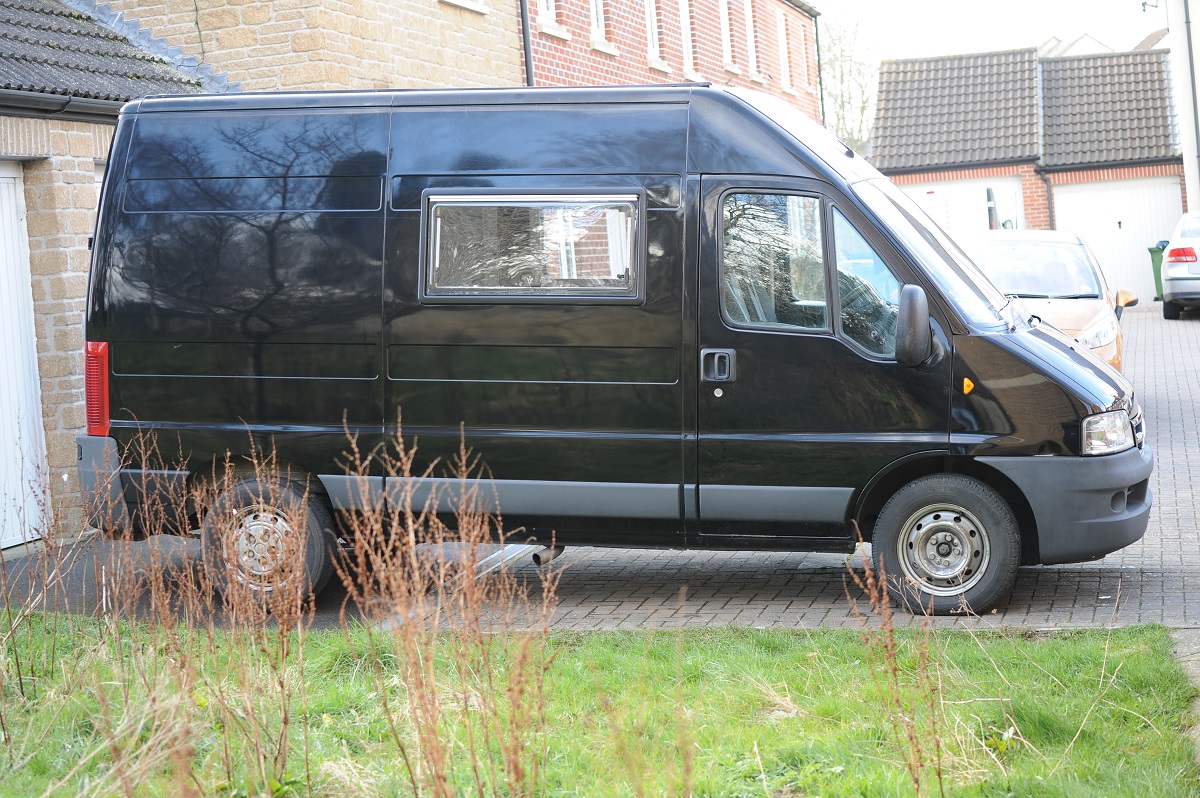
I opted for Seitz S4 1000 x 500mm top-hung windows for both the sliding door and for the opposite van wall. I used Top-hung because it has the advantage that they can open fully when parked for the best ventilation. I did not add any additional windows in the rear or roof ventilation because of the cost, time requirements, and potential for leaks from above.
Equipment
Procedure
Prep and Measure
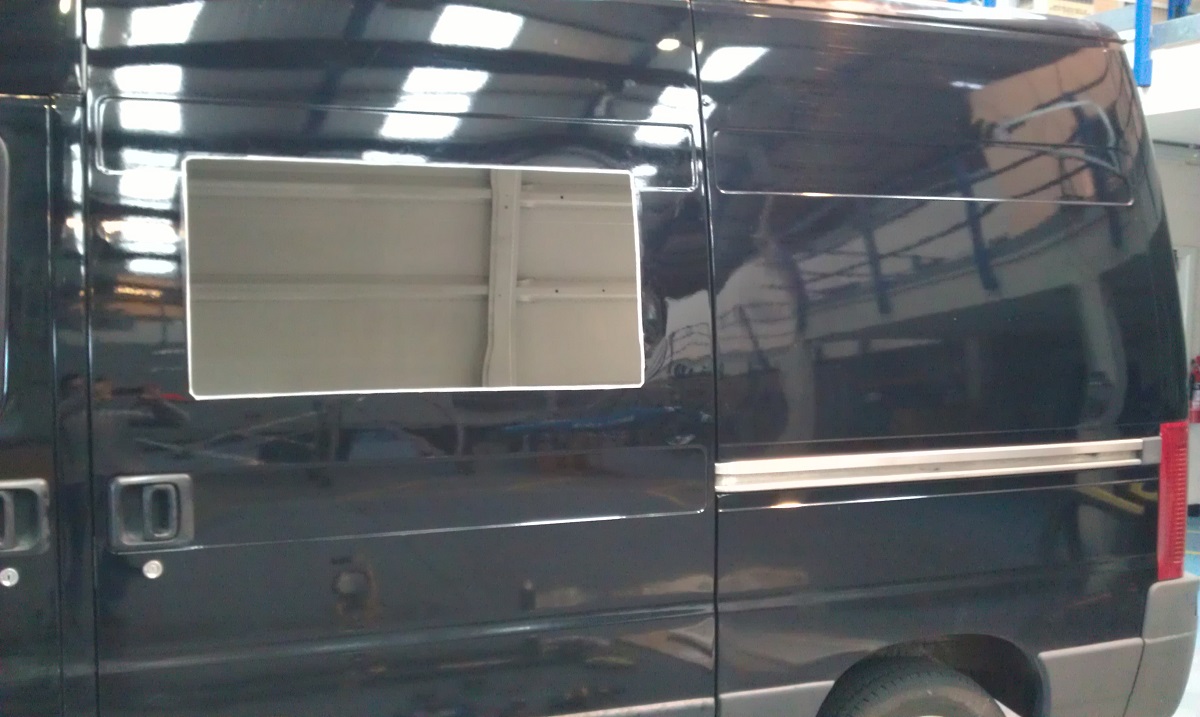
I began making cardboard templates, but decided that it was too difficult to get them exactly where I wanted without being off-center in some way. I recalled when my brother first showed me how to use a chalk line and decided that was the answer. I tossed the cutout and used my measuring tape and rule. I wanted this window to sit centered in height with the front window and centered in the width of the sliding door. I snapped horizontal chalk lines from the top and bottom of the front window so that I could then find exact center and chalk it. Next, I measured the center of the door width and snapped a line vertically. After I had center lines for vertical and horizontal I could easily measure out the window dimensions. It was difficult to measure the lengths on the van wall side because of the curved and slippery van sides.
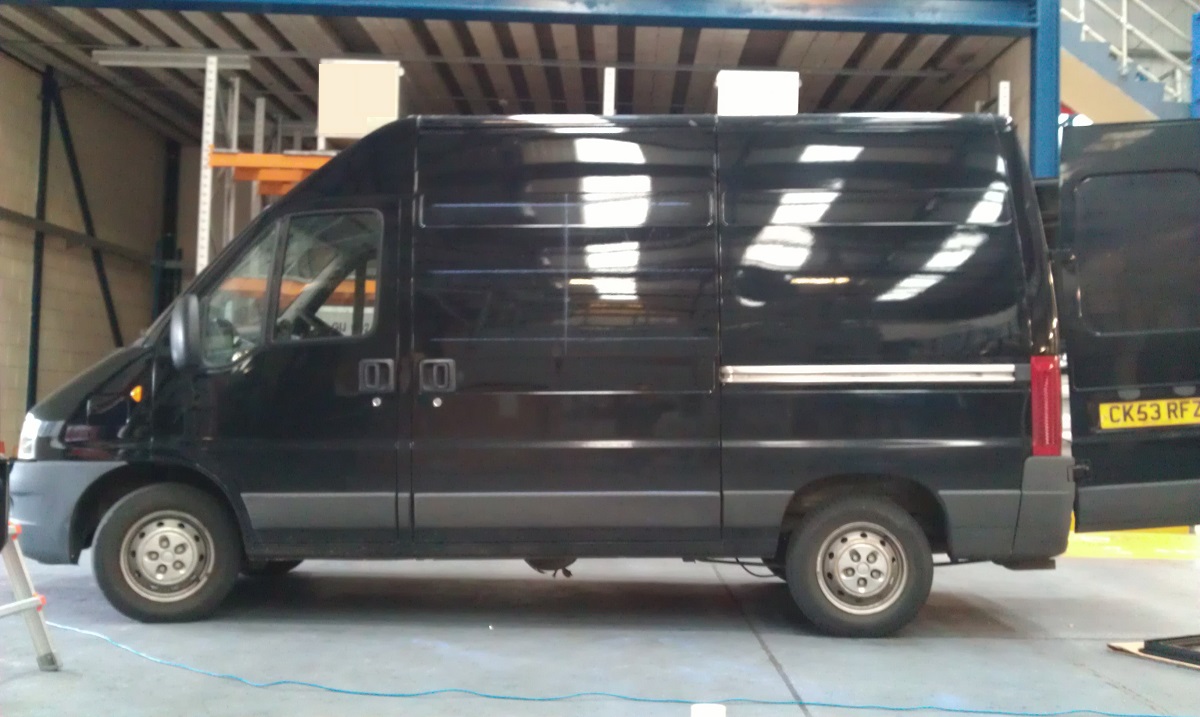
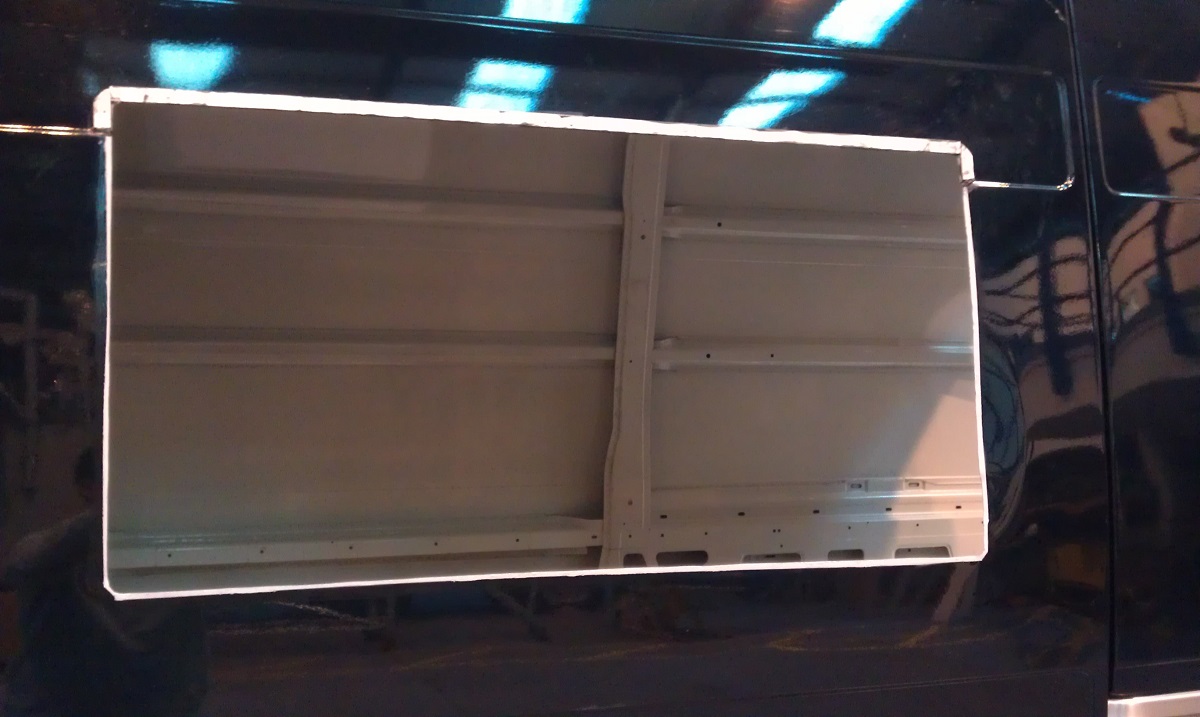
I started with the sliding door in case I made a critical error. You can buy a new door, but you can't buy a new side of the van. You can see the 4 holes already drilled with my step (or cone) drill bit. The documentation says a radius of 12mm, so a 24mm drill bit or hole saw should round the corners just right. Some people don't bother rounding the corners and say the window is fine. If I did it again I would just round the corners with the jigsaw after making an entry hole. You can also see the brace in the center of the window. The left side was held very easily and I could just pop it out with a flathead scredriver and a hammer. I spent a lot of time on the right side (by the door handle) trying to do the same. Eventually I realized that the unit was fully rivetted at an impossible-to-reach location, so I used my Bosch PMF 180 E to cut that end. For any of the braces make sure to put something behind it so if the tool bounces out or when it cuts through there is something to keep if from touching parts you would rather not. I used some wood shims I had left over and they worked perfectly as a backstop, and also did a great job pushing the brace away from the van door.
I taped off the cutting area with masking tape. On my black van, the tape ended up being my primary cutting guide, but its real purpose is to keep the foot of the jigsaw from scratching the paint. I have read that removing the foot of the jigsaw and just using the roller to guide the cut makes it more simple and removes the potential for scratching and the need for taping. This method requires more control than I expected on a ladder on the side of a van so I didn't use it. Everything went well, though removing the tape afterward was less than easy.
Cutting
As my first real job with the van, I wanted to be precise, so I decided to use the jigsaw. Other builders have used nibblers, but I have heard they can leave small creases in the metal. I thought about using an angle grinder with a thin disk but have found them to be a little too difficult to control with the precision I wanted. I cut the aperature and then trimmed it to fit the window. Don't forget to use oil for your blade. I highly recommend eye protection. There were pieces of metal flying everywhere. I ended up with some in my hair, all over my clothes, and I could feel them bouncing off my face as well. I also recommend ensuring the the window fits before pulling off all the tape and cleaning the area. That cost me some time on the first window. The image is of the cut in the sliding door side, but both sides came out great. After all the cutting and trimming was finished I used a file to clean up all the edges. For the final touches I used Hammerite with a brush, and then a spray rust treatment to finish it off. Most of my cleanup was with a rag and white spirit.
Overall, cutting was the easy part, though the most stressful.
I found out quickly that the small indent along the top of the van was too deep for me to be comfortable with. It was 3 or 4mm deep and I wanted to make sure the seal would be perfect, so I decided to build up that area to make it flush with the rest of the panel. I found 15.5mm x 1m PVC strips at Wickes. I Sikaflex'd two of them together to make them thicker. Two strips across the top, then I cut some strips to fit on the sides. These needed to curve for the rounded window edges so they wouldn't stick out. No problem; I just took a standard pair of scissors to them. I put a thin layer between the strips and let them set up for a while, then I stuck them to the van. Once they had some time to set up, the window fit perfectly on top of them. Clamping them too tightly to the van causes your Sika to squish out, but if it hasn't set up enough they may slide down a bit. I just used my fingers to move them back in place and let them set up for longer.
Mounting
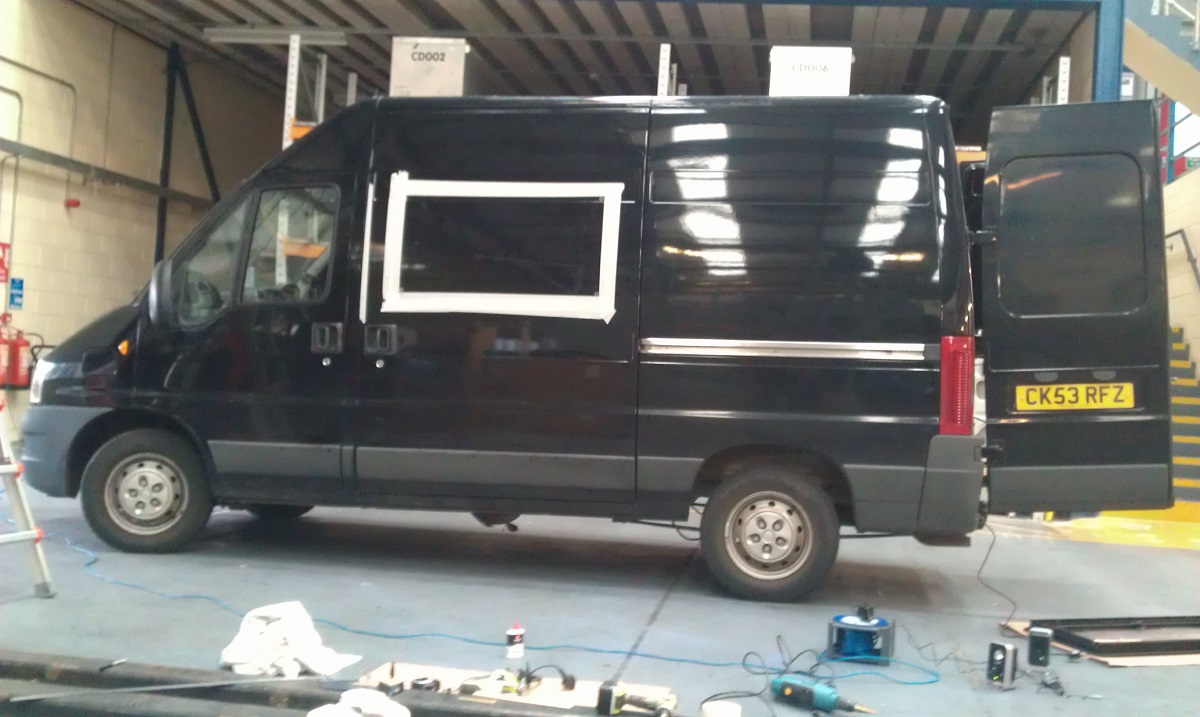
Many people refer to their windows as double-sealed. If you look carefully at the picture of the outer window area you can see a small rubber strip with grooves in it bordering the entire window. I filled that full of sealant. This will contact the van when you put the window in. Be careful, there isn't much to grab onto when you do this so don't get Sika all over your hands. Once the window is in place, you seal the outside again like any other sealing job. This gives you the extra peace of mind of a double seal. I would recommend using a non-setting mastic on the inner seal. I noticed that the Sika cracked on my windows after roughly six months. The outside is easily sealed again, but I would like to have had the mon-setting type on the interior. On the next image you can see the inner portion of the window. The Seitz style is to sandwich them together. For the sandwich to work it must have an area that is 26mm thick. If you are building a van you will have to build out the area. I used 25 x 15mm wood because I had no idea how my interior would be set up. This is the smallest dimension possible for this window type if you have no other build up on your van. Battening the window in this way will make it a recessed window into the wall. I find that I like the look.
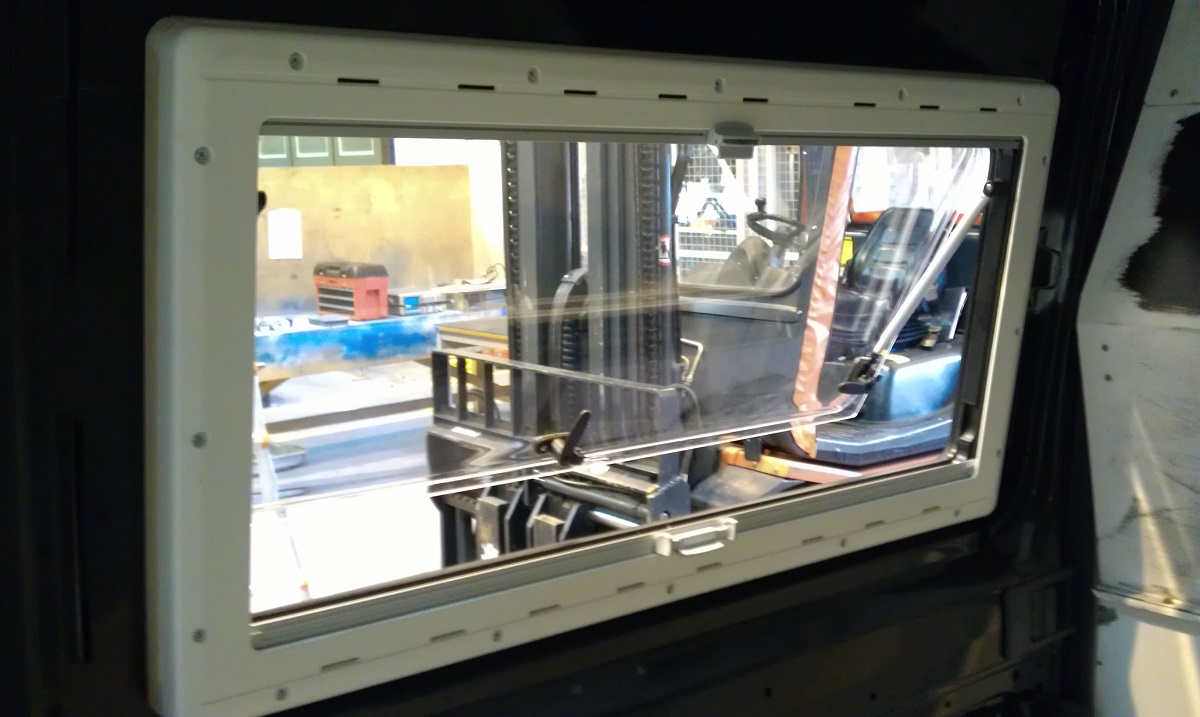
The first thing I did was make sure that the grooved rubber strip that runs along the outside edge of the exterior window half was seated properly. On one of the windows it had pulled up in some spots. The other window had no issues. Then I ran a bead of Sika along that entire border. This makes the secondary seal when you install the window. Because of the slope of the van walls I was able to push it in and let gravity and Sika hold it happily in place. In one of the images you can see the wood I used to build out the area to the required depth for the windows to sandwich onto. I chose not to Sika these to the vehicle because it takes a while and there really isn't a need. It is on the interior and you have two seals preventing water from entering. On the door window I even rounded the corners to match the window back. It was difficult to hold all the wood in place while installing the window so the next one I didn't round the edges at all and just tapped in a trim nail on each side of the top and bottom wood to make a very flimsy frame. This could then hang from the top of the window while I get the backing on, get a screw and drill in the backing, and pull the outer window in to ensure the screw can bite in and pull. This way worked very well.
Once I tightened all of the screws I went back to the outside and sealed the window again to create the double seal. I ran tape to keep a crisp line and then ran a bead around the window. I then used my gloved finger to run around and smooth it down. After that, I removed the tape was finished sealing. If you're me, the last inch of tape tears, which makes you dig it out and mess up the smoothed look. Then you do it by hand and it doesn't blend very well. However the sealant is smoothed, the look is secondary to the function, and my windows are wonderfully sealed now. I went back inside the van to install the blanking caps for the screws.
Thoughts
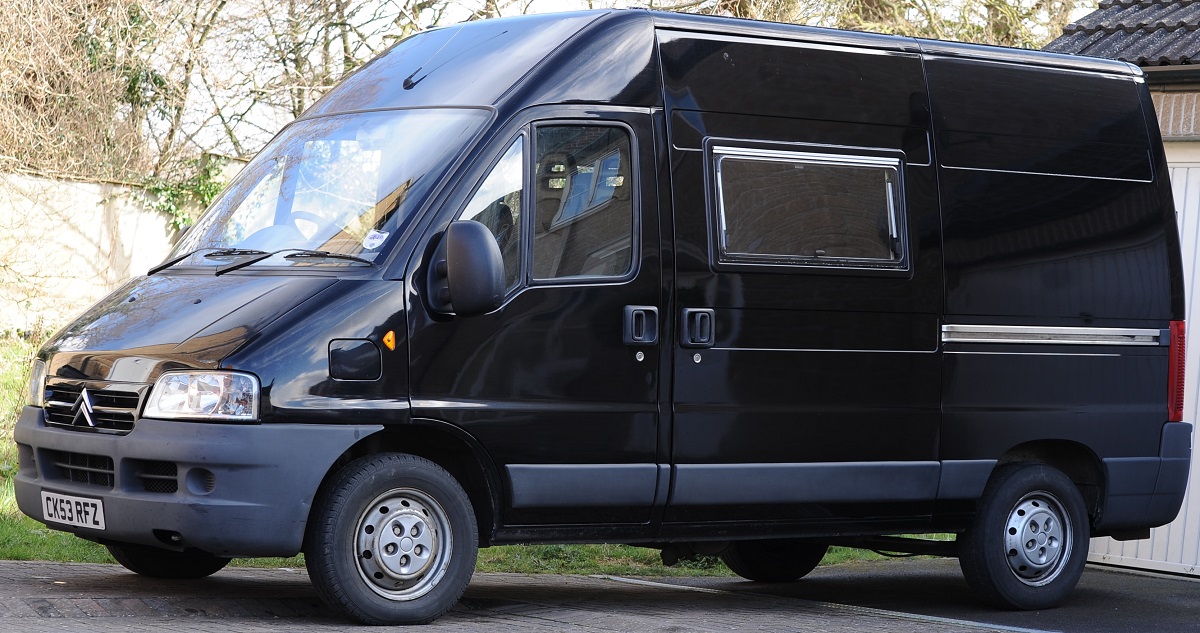
When I decided on the location of the sliding door window, I placed the center of the window in line with the center of the front window. For the other side I wanted to give myself a little more height inside the van. I wanted to make sure that when I installed the cooktop that it doesn't block the window or the latches to open the window so I aligned the top edge of the window to the top edge of the front window. This gave me a few centimeters of extra height and still fits the lines of the van. I went with a smaller window than I originally wanted on the sliding door because I was didn't want to have any worry about if it was too big to fit. I've measured the distances with the window in and in looks like I could have gone larger without any problems. The maximum size that would fit is 1100 x 600. Seitz doesn't make a window that size, but they do have a 1000 x 600, which would have given us some extra visibility.
Sliding windows can only ever open half way, but have the advantage of being usable while driving. After smacking my face on the open sliding door window I think a future build would incorperate a sliding window in the sliding door and a top-hung in the fixed wall. This adds a little more ventilation while driving.
Installing the windows this way may cause a slight distortion; this is more obvious on the upper portion of the window. Larger windows cause a greater effect. This is caused because the van panels are naturally bent, but the window is straight. Once you tighten the window, it straightens the panel. I've read that you can loosen up the top and bottom screws a little to releive that pressure, which will then create a little more of a gap on the top and bottom. You then apply sealant again and your windows are mounted without pulling the panels. I don't know if the screws might vibrate loose over time using this method and I don't like the idea of sealing larger gaps like that. If I tried that I would be paranoid about leaking forever. The method I have used has a slight visual drawback but ensures that I'm happy.